Traditional Art Week
Forewords
I use lots of watercolors in my mixed media works and people once in a while ask me how do I paint backgrounds so that objects or characters do not get painted at the same time. I often just paint background around a character quickly with free hand, but if I want to be more precise and when there are lots of jagged edges or tiny details to go round, I use masking fluid to protect those.
Here is a little tutorial how I use masking fluid in my mixed media works! You can use same tips in your pure watercolor artworks – the fluid still works similarly.
What is masking fluid?
Masking fluid is a handy tool if you want to leave some areas unpainted when painting with watercolors. It allows you to paint freely over the masked areas so you can avoid painting around complicated characters – instead you can just paint over them.
Masking fluid made of rubber, latex, ammonia and in some case there is also pigment added on it so that it is easier to see where you have applied it on a white paper. The masking fluid I use contains yellow pigment. Beware of smell - this stuff stinks!
Step by Step
- Before applying masking fluid you should have planned which areas you want to leave paper color and in which areas you’re going to paint. Usually the masking fluid is used on direct contact with paper but you can also mask already painted areas. If doing so, keep your mind that peeling of the fluid might peel off also the paint underneath it.

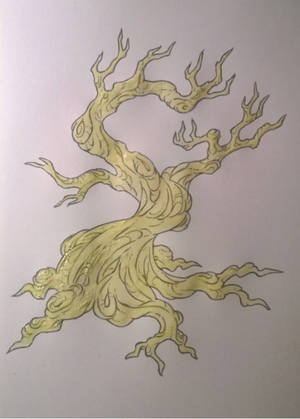
Here is a picture of a lineart I prepared for this tutorial. It is inked with waterproof grey marker. There is a tree with lots of pointy branches that would be quite challenging to go round without a help of masking fluid when painting background. Pencil sketch would work perfectly as well so it is not necessary to ink lines. - Do not shake the masking fluid bottle! It can cause masking fluid to lump or create air bubbles in it. You do not want those on your paper because they can cause unwanted results and mess. E.g. if you have an air bubble in your mask and you paint over it with watercolor, it reveals the paper and then you have paint there where you should have had mask. Instead of shaking the bottle you can stir the fluid gently if needed.
- Only add a little water or not at all to masking fluid. I don’t add any water because my masking fluid is already liquid enough but some artists recommend diluting the fluid with a bit of water. Diluting allows you to make more finer details but note that adding too much water will make the fluid adhere on paper more and might damage the paper surface when peeling the mask off. Of course it depends also the fluid you're using: some of the fluids are thicker than other and it is difficult to apply them without adding water. Test which method works best for you!
- It is important that you’re not going to use your best brush for applying masking fluid. It will eventually ruin your brush. So make sure that you’re either using an old or cheap brush when handling masking fluid. Dipping your brush in soap water or dishwasher fluid before applying the fluid might help you keeping the brush in better condition: it prevents the fluid sticking on brush and creating lumps on it in the middle of the process.

This is the brush I use for masking. It has (or had) fine tip for small details and it is not fancy or expensive one. The bristles have already started to wear but it will be good for couple of more masking times. If the bristles start to protrude too much, I can cut some off and in that way lenghten the brush's lifetime before I have to sacrifice another brush for masking fluid.
You can also use different kind of tools applying the fluid, e.g. silicone brushes, toothbrush, plastic spoons or stencils. Toothpicks are great for tiny details! With different tools you can create various effects; only imagination is limit here. - When the planning and preparations are done, it is action time: Apply the masking fluid on the areas you want to protect from paint. Always apply masking fluid on dry paper, otherwise it might adhere too much on paper and become difficult to remove without damaging the paper.

Here I am applying the fluid. I dip my brush direcly in the masking fluid bottle but you can also pour a small amount of fluid on a different container and dip your brush there - especially if you need to dilute your fluid with water. Keeping the bottle open too long can cause the fluid to become dry and lumpy.
It might require a bit practice to learn how to handle small areas but just be patient and take your time – in this phase you shouldn’t rush. - Remember to clean your brush with water and soap right away after applying masking fluid. Masking fluid dries quickly and it will stick on your brush and tear away bristles if you try to remove it too late. Sometimes you might need to wash your brush even in the middle of applying process if the mask starts to form lumps on it.
- Wait patiently that the masking fluid is dry before starting to paint. You can try fluid with your finger tip and if it doesn’t stick and feels rubbery, it is safe to paint over it. But do not wait for too long (e.g. days) because then the masking fluid adheres on the paper and when you remove it, it might rip also the surface of the paper at the same time. Been there, done that!
- Painting time! When the masking fluid is dry, you can paint over it; the mask is water-resistant and your paint won't color the paper under the masked areas.
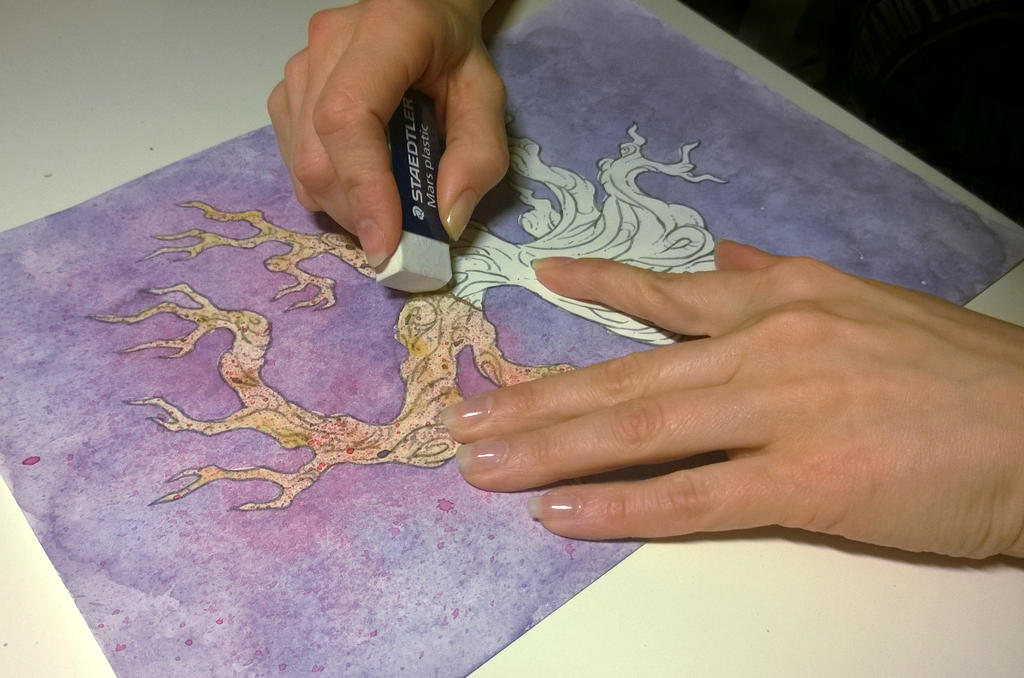
- When your painting is dry, it is time to remove the mask. It is easiest to use an eraser to carefully remove fluid. You can also just use your fingertips to gently rub and pull the fluid off. Keep your fingers and rubber clean when doing this phase – otherwise your paper-white masked areas won’t be so white anymore…

I had a bit thicker layer of masking fluid on this part of my painting so I can just pull the mask off.
At the beginning I helped loosing the mask by pushing it with rubber.
Here the mask has adhered tighter on the painting so I use a rubber to pull it off. Still easy to remove!
(In case you're wondering how the paper is so flat after being painted with watercolor, it is because I had the painting laying under a light weight over night. Do not use heavy weights when the mask is still on the paper!) - Depending on your painting, you can leave the masked areas white or paint them with another color. Masking fluid leaves sharp edges on those white areas so it if looks too harsh on your painting, you can carefully soften the edges with dampened brush.
I usually use masking fluid to protect characters when I paint the backgrounds so after I have removed the fluid, I am coloring the characters with either watercolors, markers or colored pencils.
Discuss:
- Have you used masking fluid?
- If yes, did you like it and find it useful?
- If not, are you planning on testing it?
- Feel free to share your masking fluid tips!


